1 Overview
Using a Raspberry Pi4 (2GB), I built a two-wheeled rover capable of tracking objects with its pan-tilt camera. To accomodate the RPi’s relatively weak CPU, I used Tensorflow Lite and Mobilenet-Single Shot Detection (SSD), a lightweight model with decent performance. To control the pan-tilt camera, I tuned two Proportional Integral Derivative (PID) controllers to control two servo motors (one for panning and another for tilting).
2 Motivation
During the (sweltering) summer of 2020, our pet Crystal developed a skin condition that forced her to be in a constant state of itchiness. As biting and scratching herself drew blood, we needed to constantly observe her and intervene when necessary. Frustrated with how often she sneaked off to bite herself, I built an object-tracking rover to follow her around.
3 Design
3.1 Hardware
I used the following hardware:
- Raspberry Pi 4B (at least 2GB recommended)
- Robot Car Chassis
- TT Motor + Wheel X 2
- 4xAA battery holder
- Acrylic board to hold everything together
- L298N Motor Driver (Used to control the motors)
- 5MP Camera for Raspberry Pi
- FFC Cable longer than 20cm (as you will need to move your camera around)
- SG90 Micro Servo X 2 (to pan/tilt camera)
- Mini breadboard
- Jumper wires
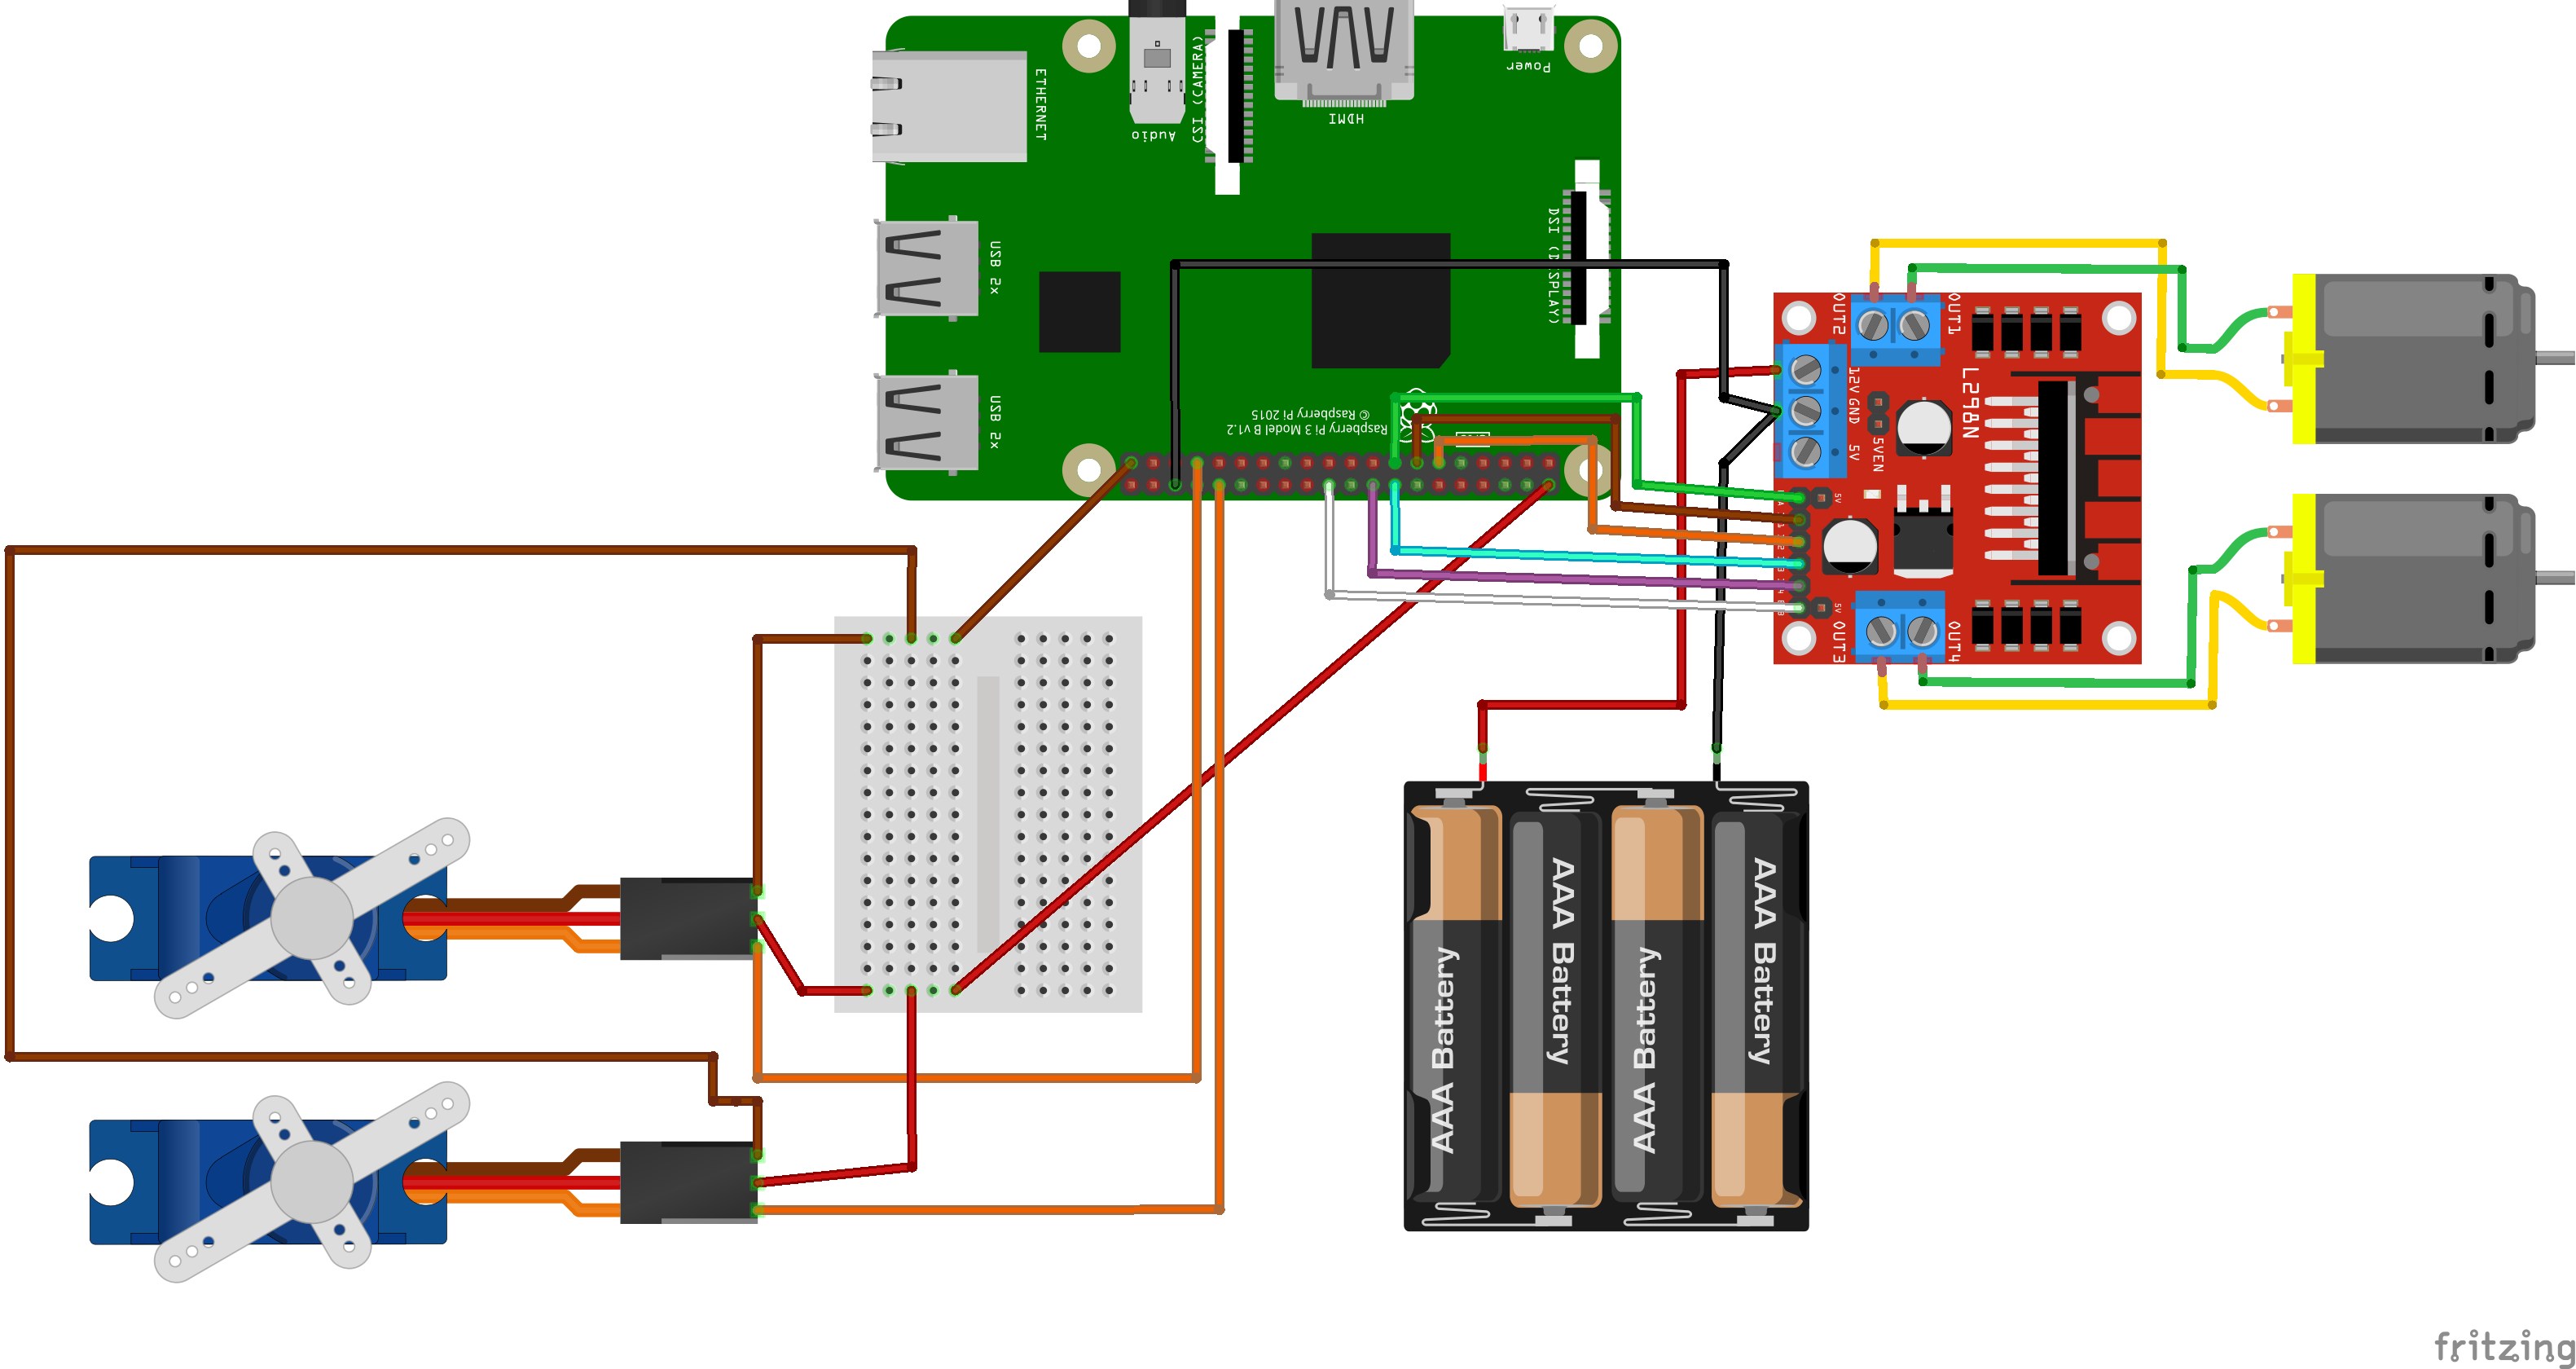
The above schematic is how I connected all the components together. There are two parts to the diagram: the motors (the batteries, L298N motor driver and the two DC motors) and the servos (the breadboard and two servos).
3.1.1 The Motors
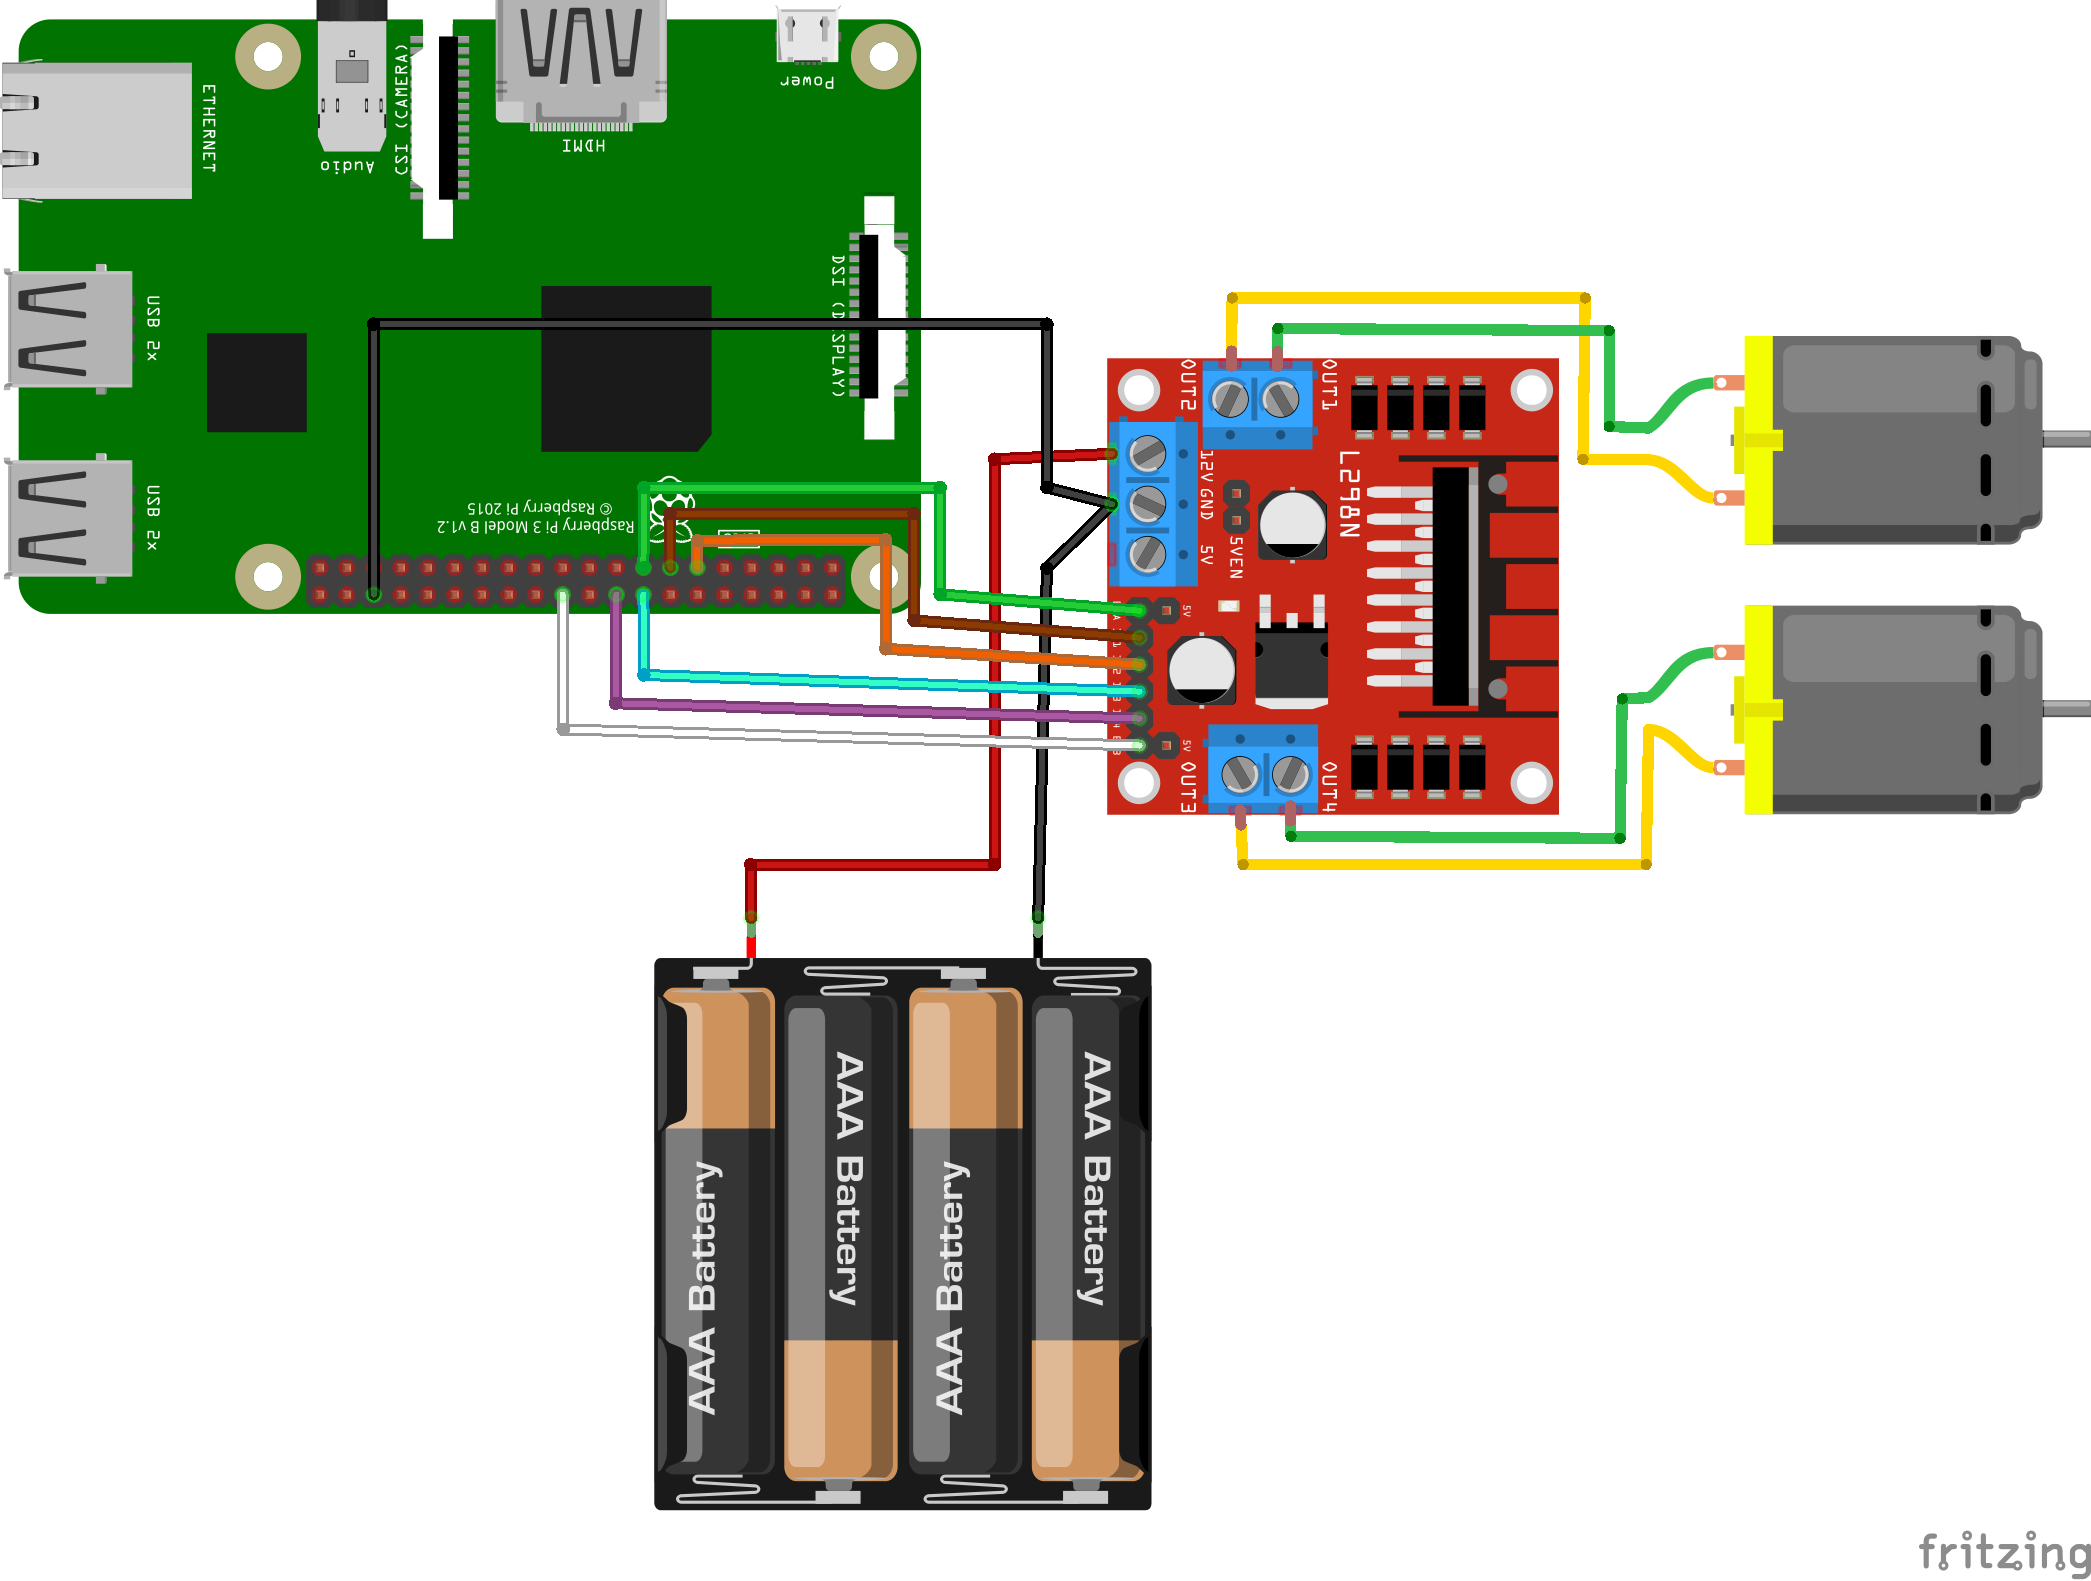
- Connect the two DC motors to the L298N motor driver
- Connect GPIO BOARD pin 13 to the L298N in1 pin (Brown)
- Connect GPIO BOARD pin 11 to the L298N in2 pin (Orange)
- Connect GPIO BOARD pin 15 to the L298N en1 pin (Green)
- Connect GPIO BOARD pin 16 to the L298N in3 pin (Blue)
- Connect GPIO BOARD pin 18 to the L298N in4 pin (Purple)
- Connect GPIO BOARD pin 22 to the L298N en2 pin (White)
- Connect the batteries to the L298N
- Connect the L298N to a GPIO GND pin
3.1.2 The Servos
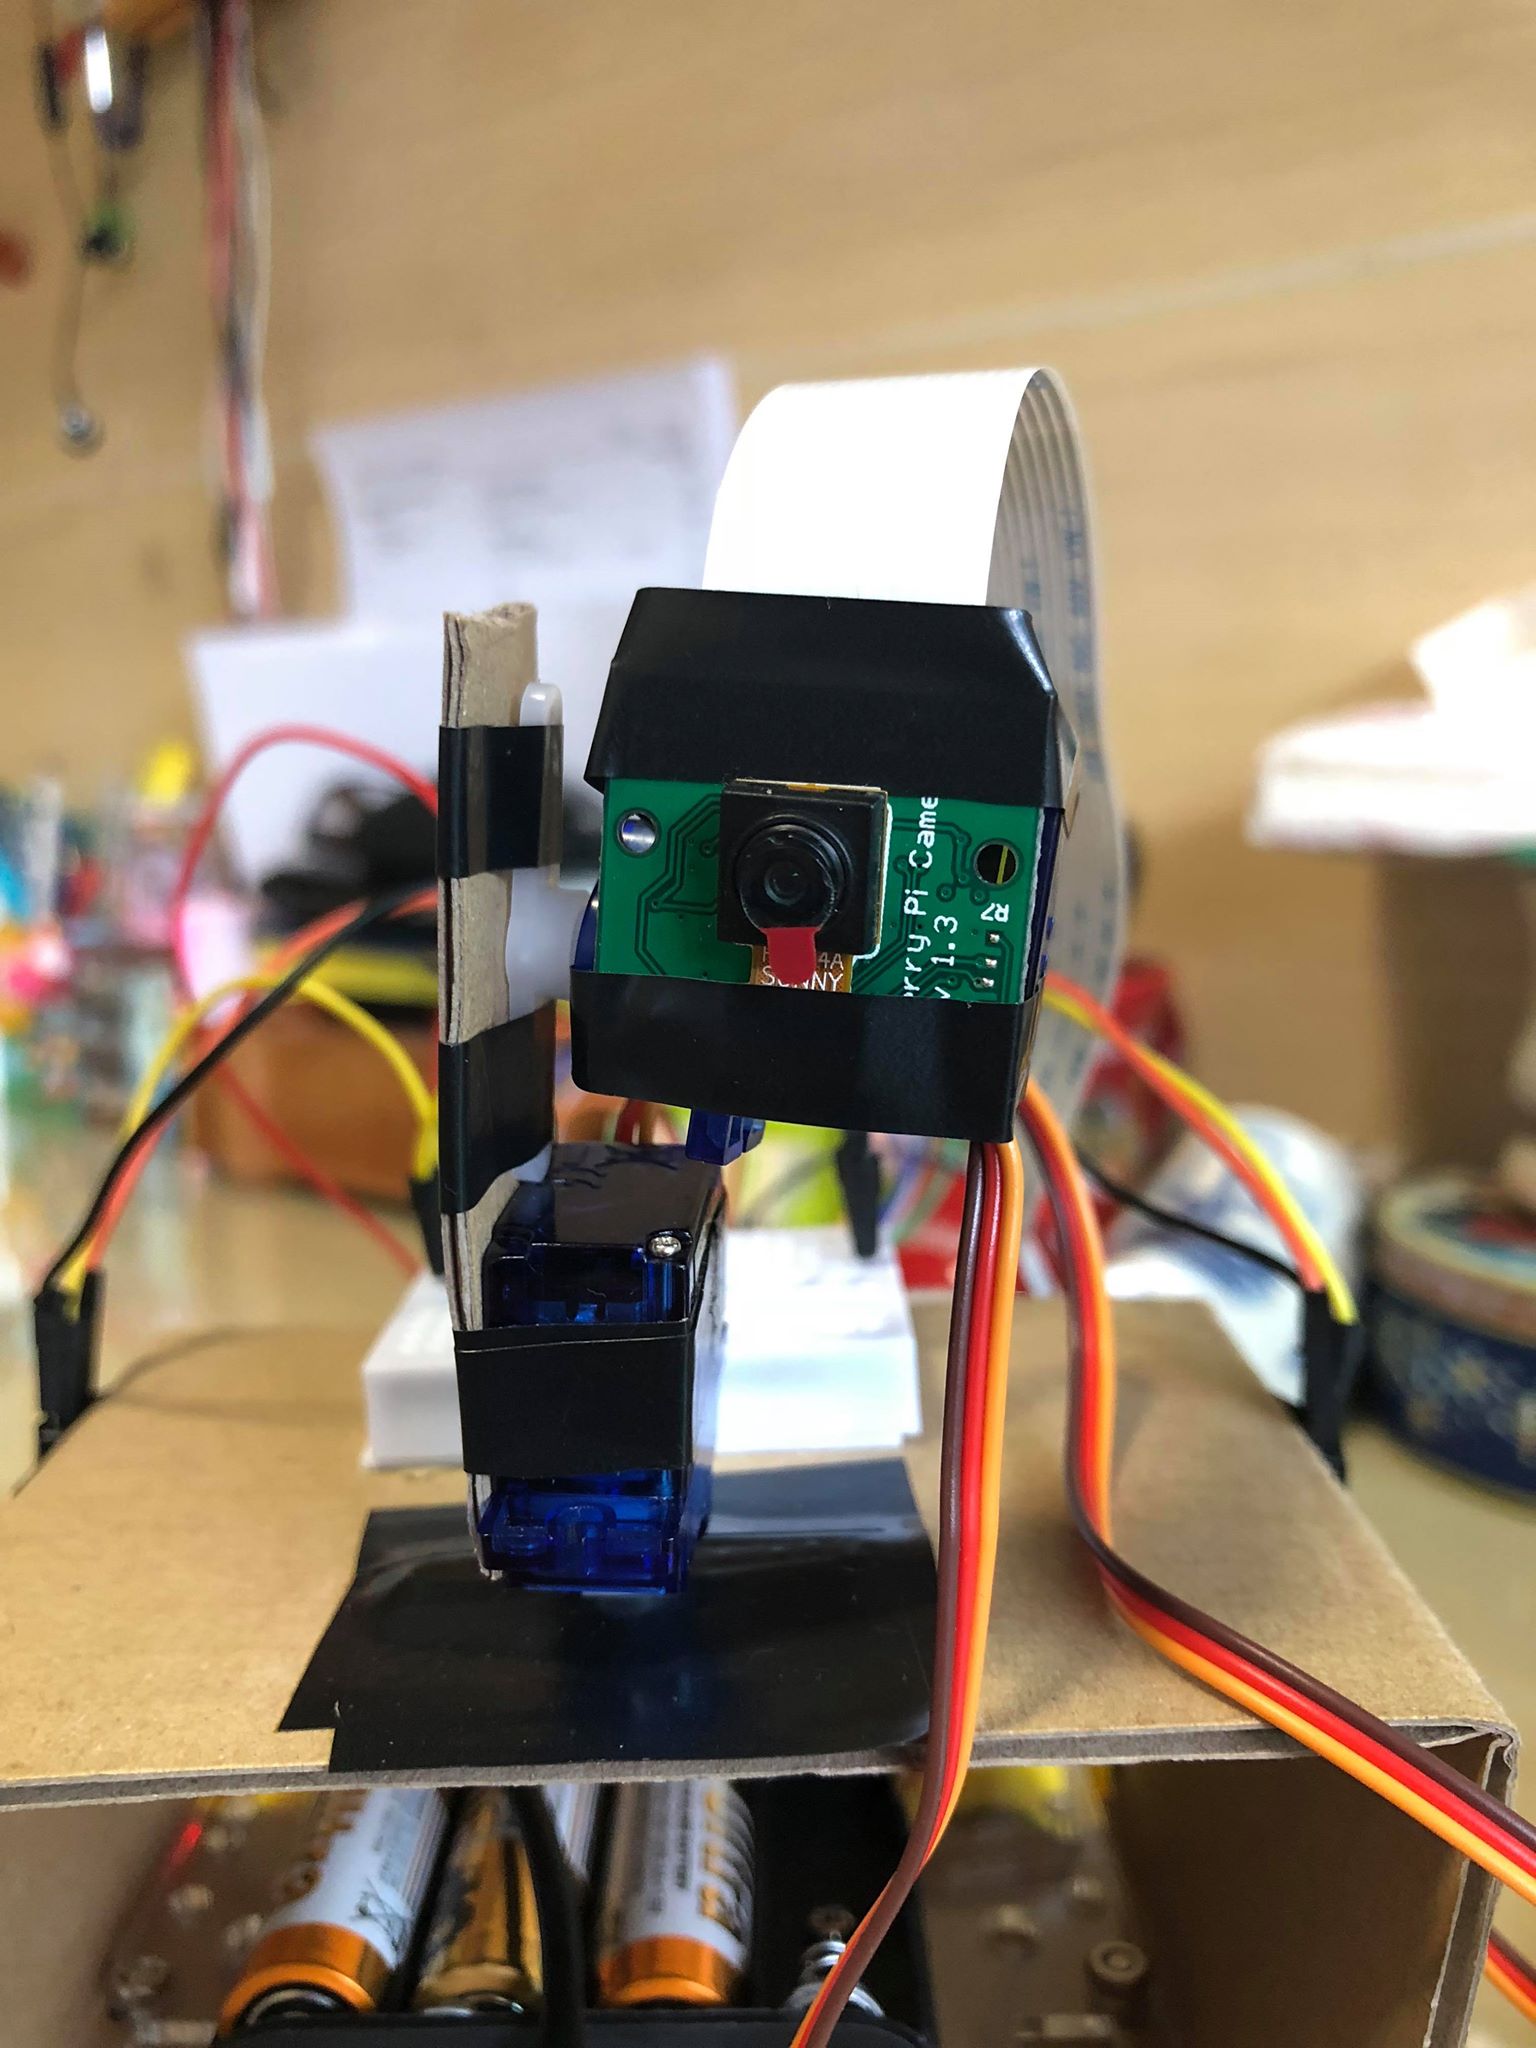
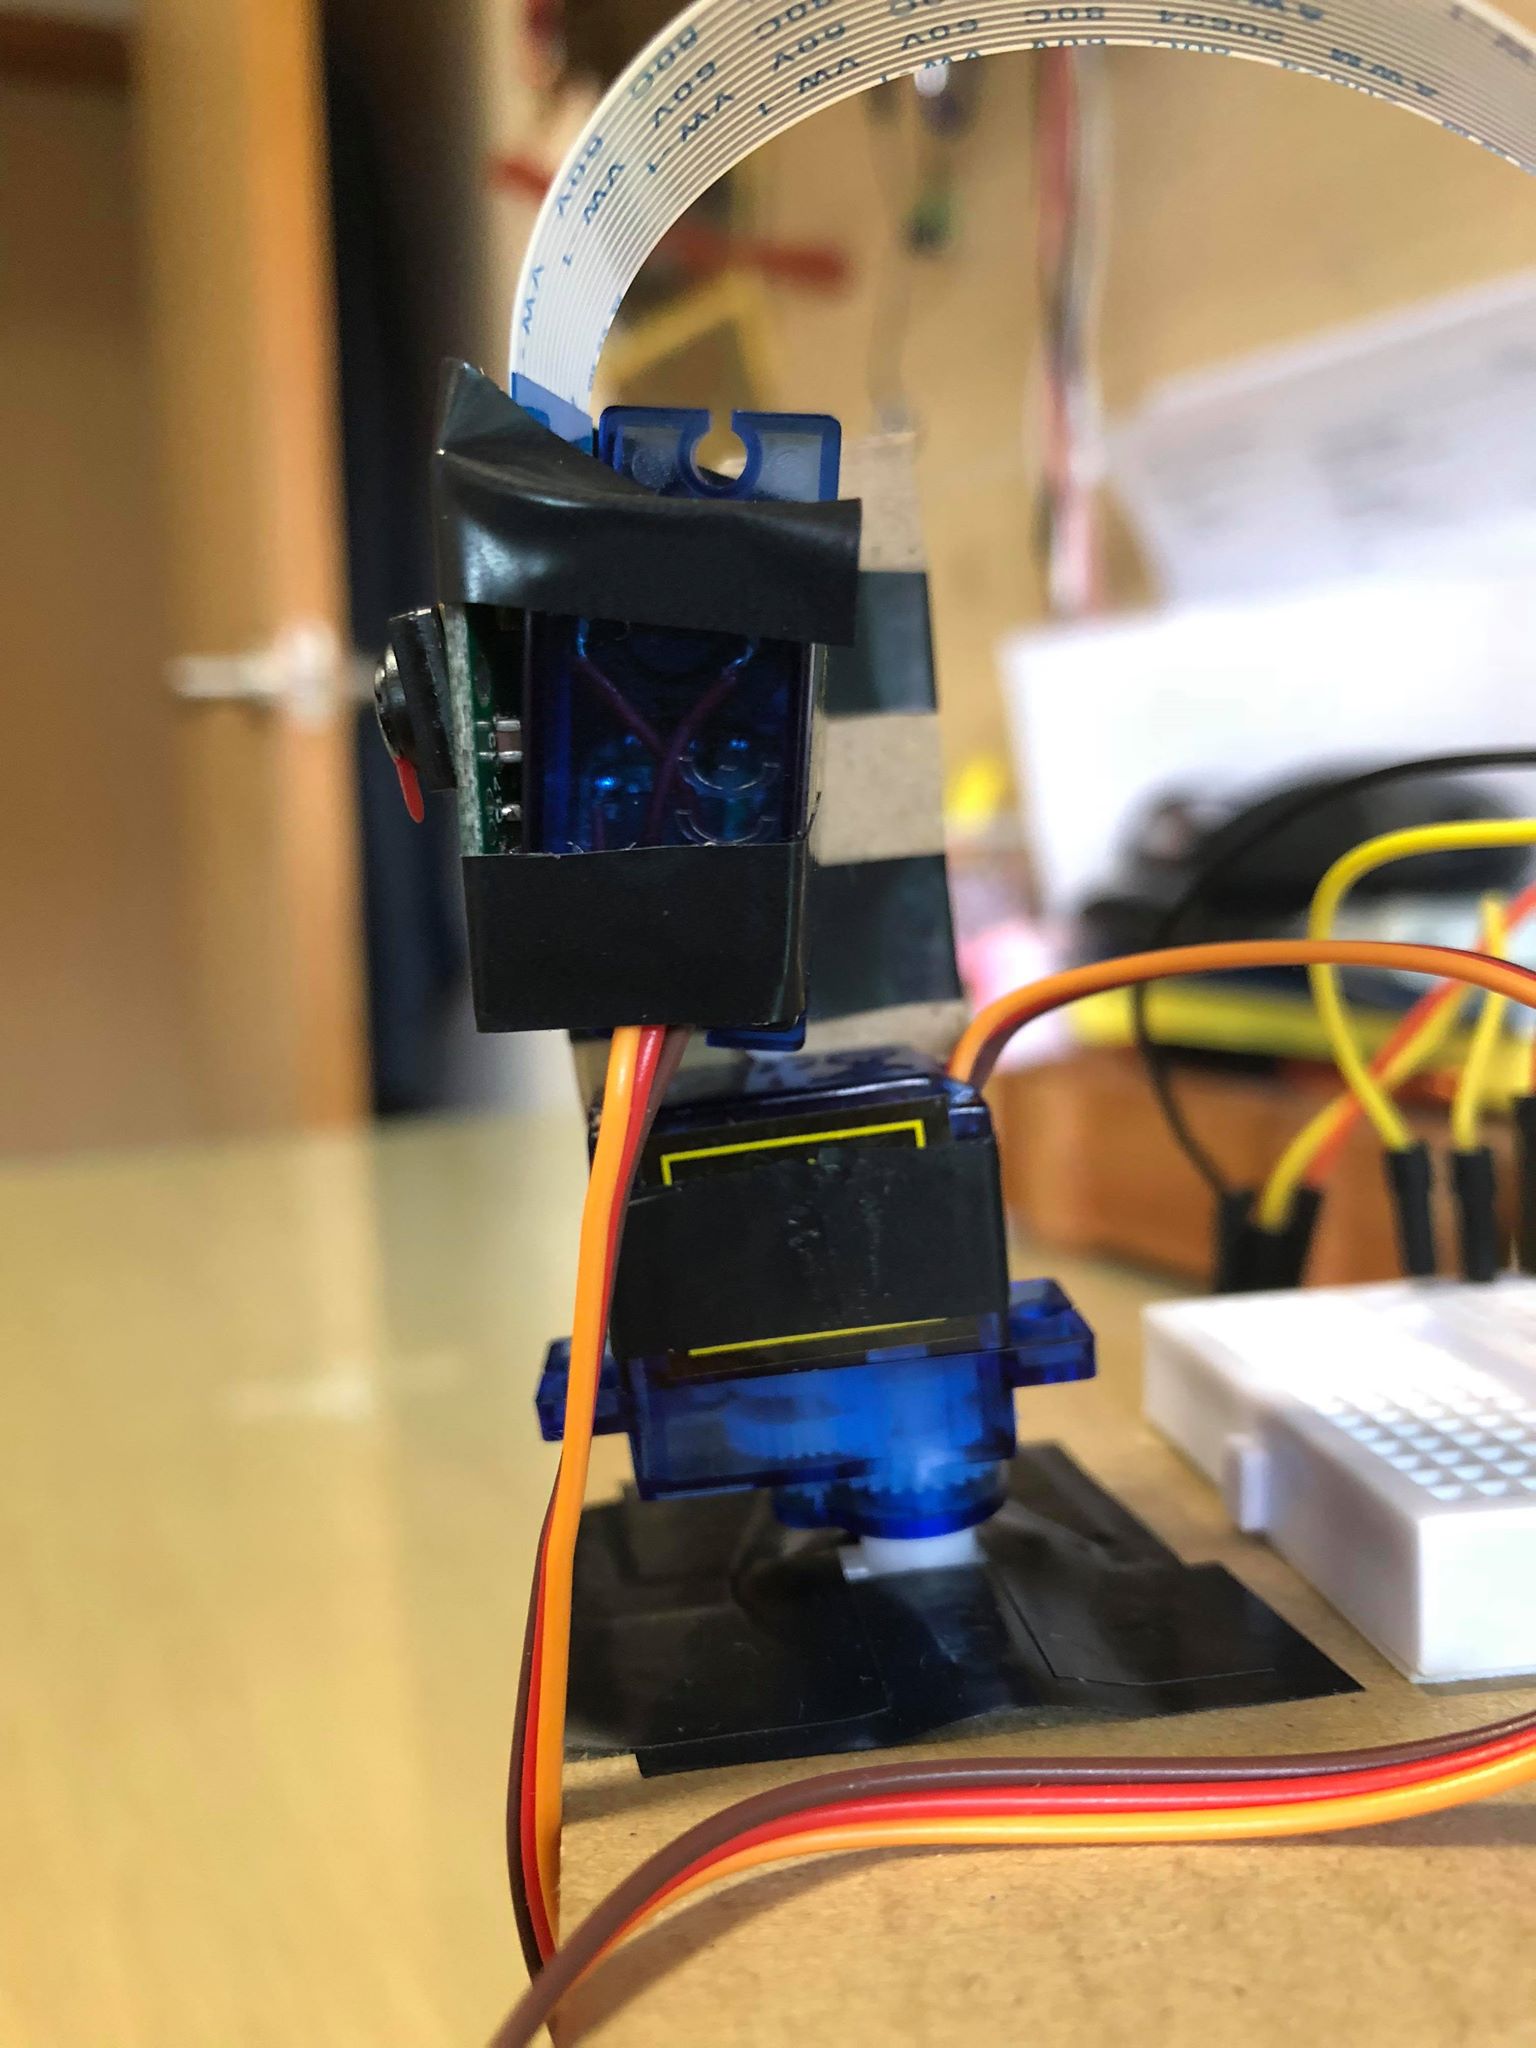
The servos are simply wired up according to the previous schematic diagram. The servos are used to build the pan-tilt camera (with some old-fashioned duct-tape):
3.2 Software
To track an object, the PiTracker needs to be able to, first, detect and draw bounding boxes around objects, and second, move the pan-tilt camera to track the detected object.
3.2.1 Object Detection
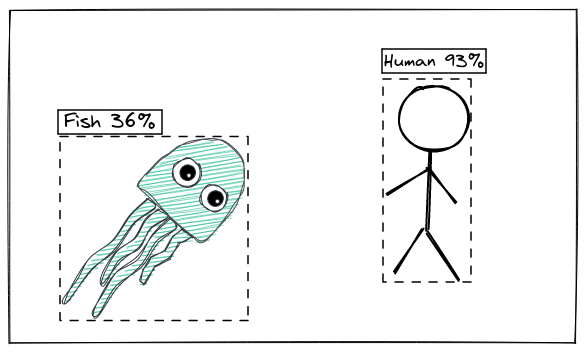
In object detection, bounding boxes are drawn around detected objects and labelled with a class and corresponding class confidence score. In the diagram above, after feeding the image into an object detection model, a bounding box is drawn around the person and given a high confidence score of 93% for the “human” label. On the other hand, a bounding box is drawn around the jellyfish with a low confidence score of 36% for the “fish” label.
As the RPi has limited CPU resources, most state-of-the-art object detection models like Faster-RCNN and YOLO-v3 (even the Tiny version) are too demanding, resulting in an abysmal ~0.1-0.2 FPS. After experimenting with various object detection models, I found that using a quantized Mobilenet-Single Shot Detection (SSD) on TensorFlow Lite was able to detect objects with decent accuracy at a reasonable 3-4 FPS.
Refer to /utils/obj_detector.py for the implementation details.
3.2.2 Moving the Pan-Tilt Camera
After detecting an object, the PiTracker needs to be able to move the pan-tilt camera according to the position of the bounding box drawn around the detected object. As the pan and tilt of the camera are each determined by a servo motor, I tuned two PID controllers to change the angle of the servo motors according to the position of the bounding box.
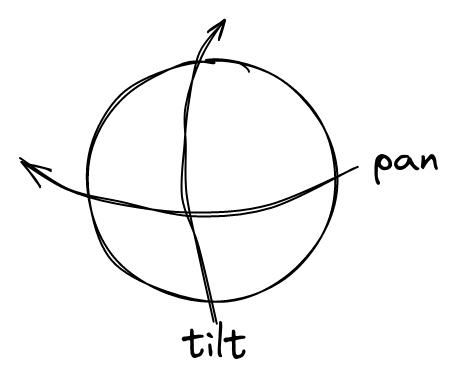
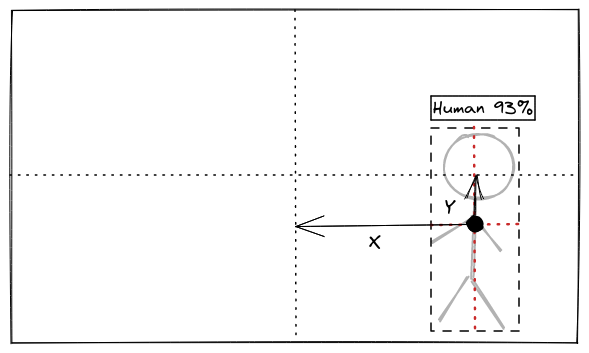
The inputs to the pan servo PID controller and tilt servo PID controller are the differences in the x-axis position (X) and the y-axis position (Y) of the center of the frame and the center of the bounding box accordingly. The goal of the controllers is to move their servo motors to reduce X and Y to 0, essentially centering the object in the frame.
Note that as SSD can detect multiple objects in one frame, I restricted the tracker to only track the object with the highest confidence score of the chosen class (eg. human, dog, book, etc.).
Refer to /utils/tracking.py for the implementation details.
4 Results
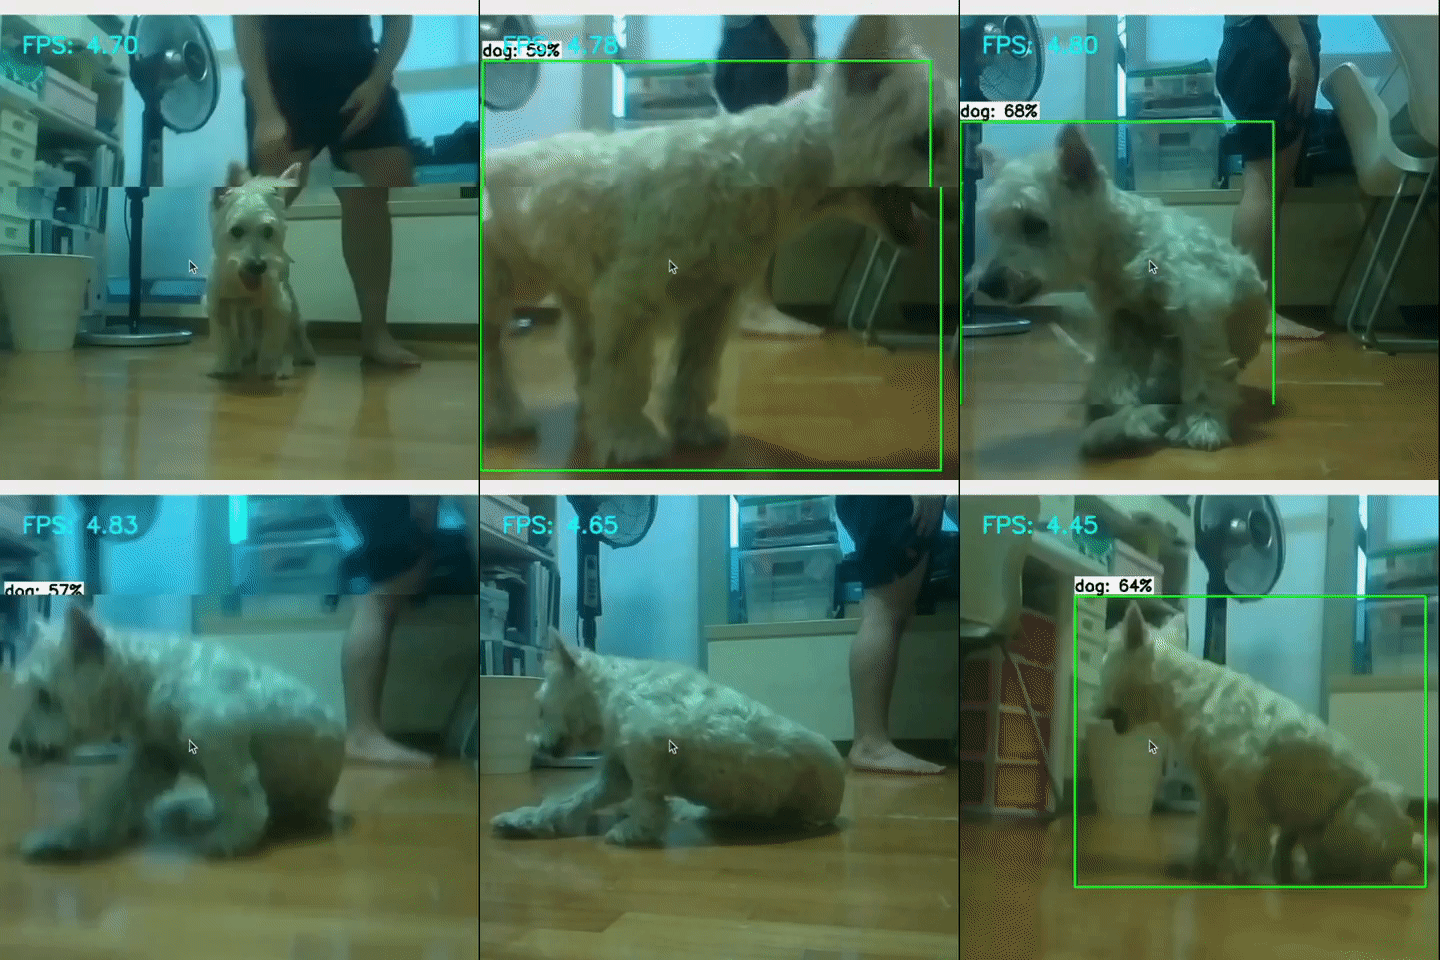
Here’s a gif of the PiTracker tracking Crystal:
